There is something magical about snow. Living in Portland, Oregon, we only get a few inches a year if we're lucky. When we do get a good snowstorm (3"- 4"), it's a white wonderland!
All of the kids come out and sled down the Henry street hill. We live at the bottom of the hill and what a treat it is to watch everyone having so much fun in the snow while I stay warm and dry by the fire.
All of the kids come out and sled down the Henry street hill. We live at the bottom of the hill and what a treat it is to watch everyone having so much fun in the snow while I stay warm and dry by the fire.
The Snowdrift table runner is a new FREE stitch-along pattern!
This table runner is my effort to make a snowscape of sorts for my dining room table. With simple stitches, we will create 12 different snowflakes starting July 13th and finishing up on October 26th.
Click HERE to download the Snowdrift
intro pattern and supply list
Gather your supplies:
Felted wool in your choice of color - 26" x 26"
*see cutting diagram below for more specific information on yardage needed
*see cutting diagram below for more specific information on yardage needed
To felt wool wash it in HOT and rinse in COLD. A top-loader is best, but I have a front loader so I added some tennis balls, towels, and other items to agitate the wool. Use a mild detergent. Then dry on HIGH heat and you are ready to go!
Valdani 12wt Pearl cotton O 514 Wheat Husk - 1 ball
This is a beautiful variegated thread that looks good with a variety of ivory colored wools
Need some? It's available HERE
Sulky 12wt thread Deep Ecru 712 1149 1 - petite spool
This is the thread used to whip stitch the wool circles in place. Regular sewing thread would also work for this purpose.
Need Sulky? It's available HERE
11 Ivory Buttons - 1/2" with 4 holes
It would also be cute to use a variety of antique ivory colored buttons in a variety of sizes. The buttons need 4 holes.
Need buttons? They are available HERE
Ivory seed beads - approximately 100
Need beads? They are available HERE
Chenille yarn trim - 2 1/3 yards
This type of yarn is available at most craft stores by the skein.
It is also available by the yard HERE
***optional***
KAI Micro Serrated Scissors
These are super fabulous scissors for cutting applique shapes. The mirco-serrated edges catch and hold the fabric without slipping.
Find them HERE
Freezer Paper
Print the circle template pattern directly on a sheet of 8 1/2" x 11" freezer paper
Packs of 10 are available HERE
Homework:
Step 1.
Cut the wool according to the instructions in the printout.
Background piece - 14" x 22"
Large 4" circles - 11
Medium 2 1/2" circles -11
Small 1 1/2" circles - 19
Print the circle template page onto the paper side of an 8 1/2" x 11" piece of freezer paper.
After ironing the wax side of the freezer paper to the wool (bottom right corner), cut out the circles. Peel off the freezer paper and continue ironing these circles templates onto the wool until you have all that is needed. The freezer paper can be used over and over!
 |
| cutting diagram |
Place the large circles onto the background fabric centered top and bottom, side to side.
I added the other circles to make sure I had enough and to get a glimpse of the future ; )
Baste the large circles in place.
 |
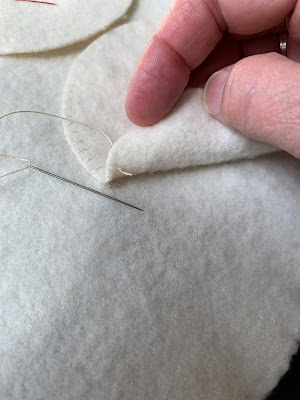
| Hide the knots under the circles and whip stitch using the 12wt Sulky thread (not the Valdani). |
On the backside pull the thread between the backing and the circle to keep the back neat.
Now you are all ready to go!!!
The first snowflake pattern will be shared here on my blog on Monday, August 3rd.
More snowflake patterns will be shared the following Monday's until October 19th.
The final finishing directions will be shared on October 26th, 2020.
Subscribe to the blog and you won't miss a flake!


2 comments:
Thank you!
Thanks! Looking forward to the Snowflake pattern.
Post a Comment