


I'm so excited to share my book Tiny Treasures with you!
I thought it would be helpful for me to show you how I like to trace my patterns, make my hexies, and any other helpful tips I can think of.
The first step I take is to make a copy of the designs onto the paper side of a piece of freezer paper. The freezer paper is available in 8 1/2" x 11" sheets which feed smoothly through an inkjet printer. *NEVER USE A LASER PRINTER WITH FREEZER PAPER.
Simply place the pattern page from the book onto the scan bed of the inkjet printer. Load the freezer paper so it will print on the paper side and make a copy.
The one thing I will point out is this will give you a finished design in REVERSE of the original. This really doesn't make a difference with most of the designs, however, there are a few designs with letters or numbers which are directional so this method won't work for those designs.
You can find a pack of 10 freezer paper sheets HERE.

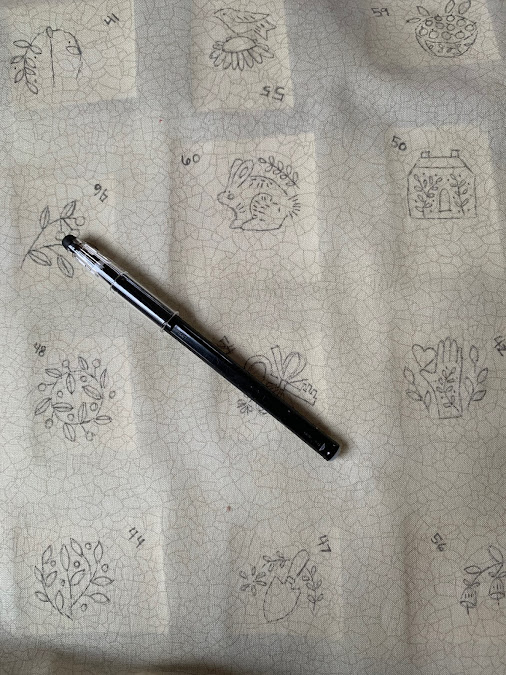
Cut the designs apart keeping the pattern number attached for reference.
12 designs fit nicely on a piece of fabric 12" x 14".
Space the designs about 1 1/2" - 2" apart.
Iron them onto the WRONG side of your fabric using a DRY iron. The wax side of the freezer paper will melt a bit and adhere to the fabric.

I used a Pilot FriXion pen to trace the designs. The lines will disappear with the heat of an iron when the embroidery is complete.
Press the finished embroidery on the wrong side.

Remove the freezer paper and stitch up the designs following the stitch and color guide in the book.
Using a fussy cut 1" hexagon template, trace around the outside of the hexie template.
I found this template I love on Etsy at - Hey Hexie!
She has a huge assortment of sizes. I went with the 1" hexagon with a 3/8" seam allowance.


Cut the hexagon out. I use my favorite micro-serrated KAI scissors.
The tiny teeth grip the fabric and make cutting small pieces a snap. They are also great for cutting applique shapes out of wool too.

Place a 1" hexagon EPP paper on the wrong side, centered. I LOVE using the
Hugs 'n Kisses Iron-On EPP papers. They work great! No need to remove them in the end. After a gentle hand wash the fibers break down and soften nicely.
Iron the paper in place (centered). Of course, you can always use regular 1" EPP papers too.

Make a glue line on one edge.

Fold over and repeat with the next side.

And now you have your first Tiny Treasures hexie!

If you plan on making the 16" x 20" My Favorites framed piece as shown at the top of the post, you will need 65 of the hexies and 99 1" triangle hexies. Both Iron-On EPP papers can be found on my website under
Fabric, Thread, Notions, Kits - Notions
I'll go over piecing this together in a later post.
Make sure you subscribe to my blog so that you don't miss the fun projects I will be sharing using the designs from the Tiny Treasures book!
Happy Stitching!

8 comments:
This would be such an awesome project to take with me when we go camping!!!
Thanks Kathy. That was very helpful.
Beautiful stitching!!
Super excited to get started!❤
Super excited to get started!❤
Just received my book, so excited! Thanks for the links to the supplies :)
These are super cute! Already started working on mine!
I know that this is an older post but could you tell me what brand and color of fabric you used? I have been searching everywhere for it. Thank you so much.
Post a Comment