A snowstorm is brewing!
Snowflake trivia -
Did you know snowflakes always have six sides?
I took some liberties designing these snowflakes : )
Snowflake #1
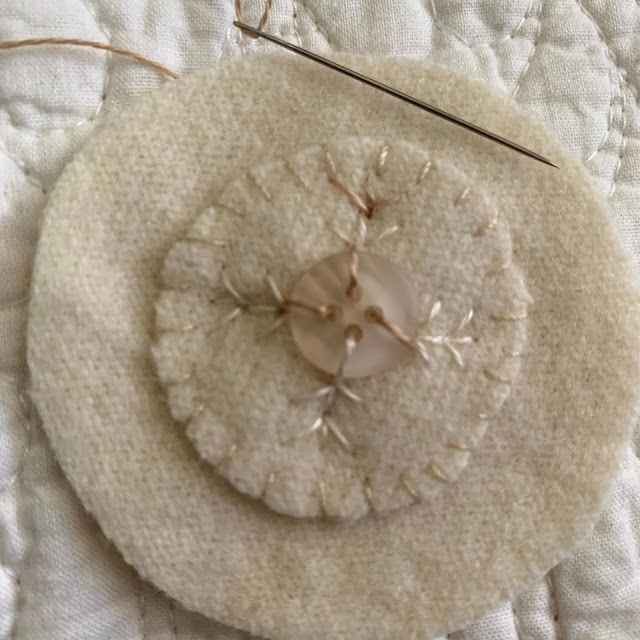
Using simple stitches, adding buttons and beads, this a pretty quick snowflake to stitch up.
The first step is to whip stitch the small circle to the medium circle using the Sulky 12wt thread.
Then embroider these two before stitching them onto the large circle.
The first step is to whip stitch the small circle to the medium circle using the Sulky 12wt thread.
Then embroider these two before stitching them onto the large circle.
If you look closely at my snowflake it's pretty obvious that my stitches are not uniform and that's perfectly OK! Nothing in nature is perfect so my stitching isn't either. There isn't a need to trace the design. These are simple enough to eyeball. If you feel you need a little help, you can use a Pilot FriXion pen which will disappear with the heat of an iron or another type of temporary marking tool.
SNOWFLAKE #1
Click HERE to download the Snowflake pattern
Please visit the previous blog post for the initial instructions and the supply list.
Please visit the previous blog post for the initial instructions and the supply list.
Start by basting or "sticking" the small circle to the center of the medium circle
Using the Sulky thread, whip stitch the two circles together.
Using the Valdani thread, sew the button in place following the directions (not all of the buttons are sewn on in the same fashion).

Now start stitching the fun stuff! Start with the stitches that are in line with the button stitch.
One done, time to move on!
Complete the 4 sections first and then continue with the stitches in-between.
This makes spacing much easier.
Time to start the next circle. This is a simple lazy daisy with two stitches coming from the base.
Lazy Daisy's are easy peasy.
Stitch the stitched circles to the larger circle using the Sulky thread and a whip stitch.
When you start the embroidery stitches, eyeball directly out from the middle stitches as shown.
Stay safe out there!
Kathy
Share a close up of your snowflake on Instagram with #SnowdriftTableRunner and tag me, Kathy Schmitz!


Enjoying this so much. Thank you for your wonderful design. Trying to think of the snowflake as imperfect!!! Maybe by #11, I will have a near perfect stitched snowflake.
ReplyDeleteBeautiful! I received my floss, beads, chenille yesterday! Looking forward to stitching on this! Thank you!
ReplyDeleteWhy are the 4" circles basted to the background before all the decorative stitching, beads and buttons are added?
ReplyDeleteReally cutee.
ReplyDeleteLMT New Zealand Reference Rifle
Please show your whip stitch.
ReplyDeleteAlso have seen a colonial knot vs the FK, i think i like it better, what is your take?
I think maybe by the #11th one mine "might" resemble yours.
Love the pattern, it will be lovely at Christmas & during the holidays.
Thank you
Ellen T
Please show or tell how to put on the beads. Thanks
ReplyDelete